Styling a Blue Alps Juniper (Juniperus Squamata ‘Blue Alps’)
© Copyright 2012
These junipers have been a favorite of mine ever since seeing bonsai
artist Marc Noelanders styled one at Brussel’s Bonsai Rendezvous in May of
2009. I was truly amazed at his ability
to take a stiff, prickly, unruly mess of a nursery stock plant to a rather
impressive aged looking bonsai in just 2 hours.
Everyone was so impressed that he was given the same type of tree to
style the last 2 Rendezvous as well with the same impressive outcome. I was rather concerned at the sounds of
cracking branches as he was styling each one.
I looked up the winners of the trees, which were raffled off at each
Rendezvous and was surprised to learn that they had lost no branches and that
the trees were healthy and happy even 2 years after the first one was
done. His insight is amazing!
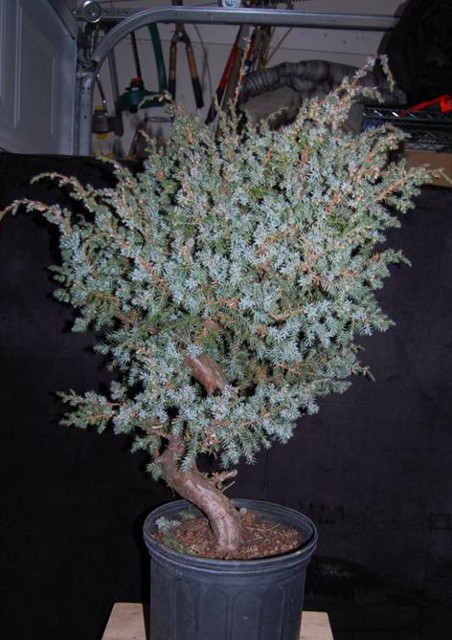
Now back to the tree I purchased.
I didn’t have my choice of trees because by the time I finally decided
to purchase one, there was only one tree left.
It had an impressive 2 inch trunk but had this man made spiral
shape. Still I had to have it, even at
$195.00. It sat on my bench all summer
and went into my winter storage hut in November. I decided to style it for this meeting back
in December but did not sell it to the club as I did the other 2 types of
junipers which are being styled by Paul Weishaar and David Higgins. It was hard to come by and I don’t know if I
will ever be able to get any more this size.
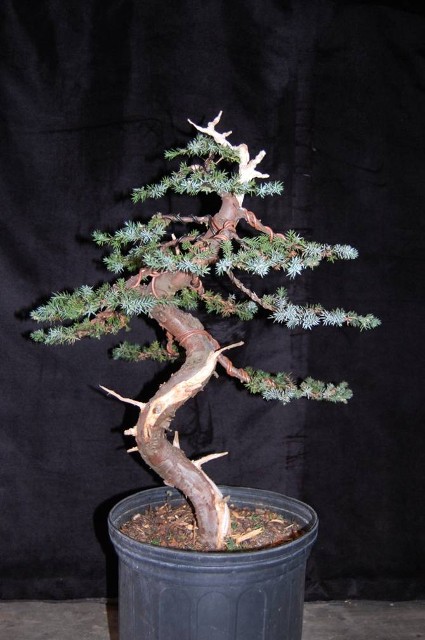
I was able to purchase 3 much larger Blue Alps Junipers last fall and
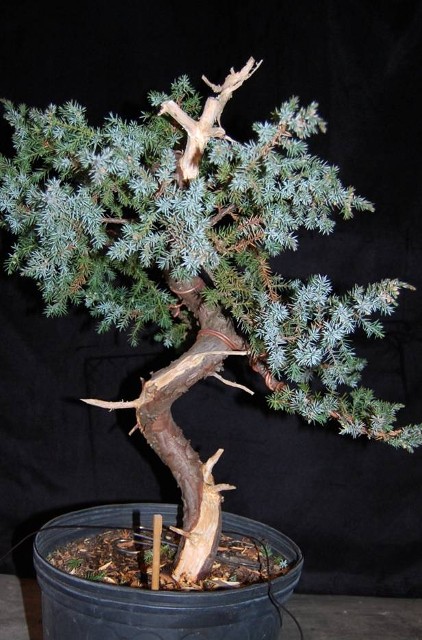
have a couple of them for sale if you are interested. Below is the tree as I purchased it.
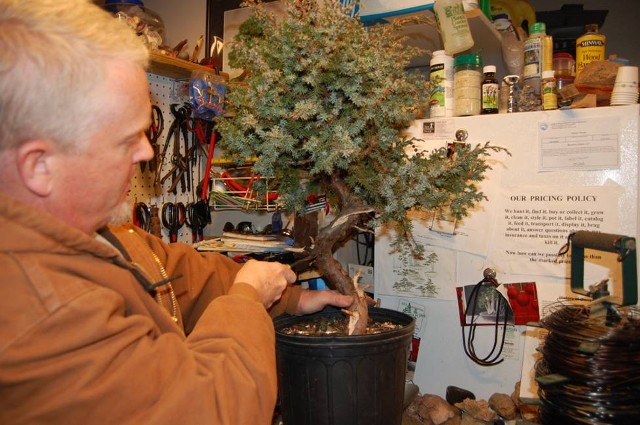
Rob Pugh and I began working on the tree in my garage on Sunday,
January 15th. The first
decision to be made was what side of the tree needed to be the front. We placed it on a turntable and looked at
every angle. The factors that were
considered in making the decision was to looking for a powerful first branch,
follow the line of the tree up the trunk to see how the remainder of the
branches were going to fit in the design and had to find the apex which was
actually growing away from the viewer. I
had do what to do with the apex in order to make it look more appealing to the
viewer and make it believable. After
taking all of that into consideration I decided on the side shown in the above
photo.
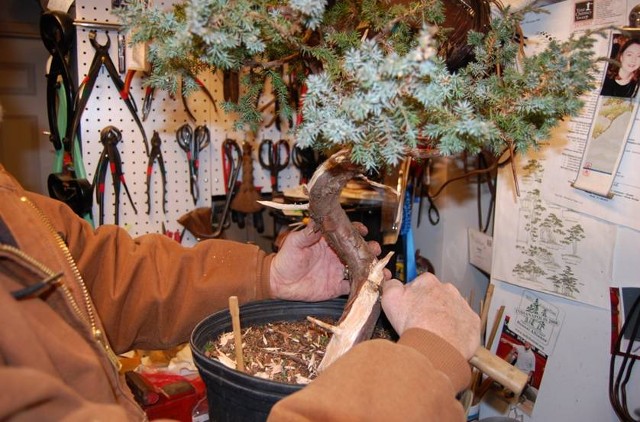
The first task we performed was to remove the small insignificant
branches below the selected first branch on the right side of the tree. I made sure to cut the branches which were ¼”
or larger off long so as to be able to carve them into to jin later on in the
process. We followed the whorl of
branches up the trunk and removed any small branches and growth along the way
so we could better view the entire trunk of the tree. This allowed us to decide what other
redundant branches had to be removed, again leaving the larger branch stubs
long for carving later. The we began carving some of the jin and that led to
incorporating some shari. This should
take the viewers eye away from the man made spiral which was so obvious.
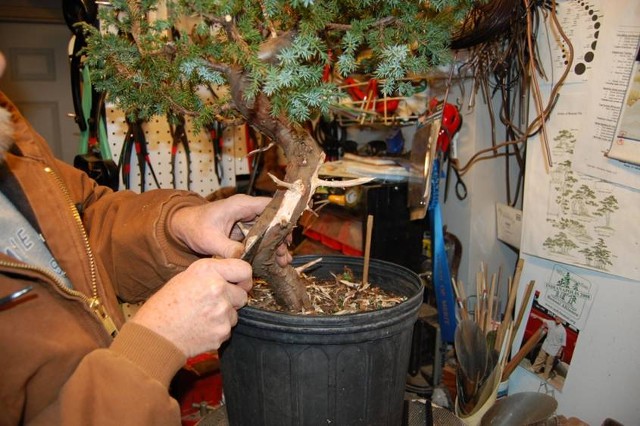
Next we concentrated on the apex.
The dilemma I had was that the obvious apex was growing away from the
viewer, a no-no in bonsai design. We
began looking for a better branch lower in the top which could be styles into
the appropriate direction for the apex.
As soon as we decided on that
branch we began removing the growth from the natural apex and stripping
the bark in order to create some really interesting jin which could be even
further enhanced by carefully carving to make it more weathered looking and
believable.
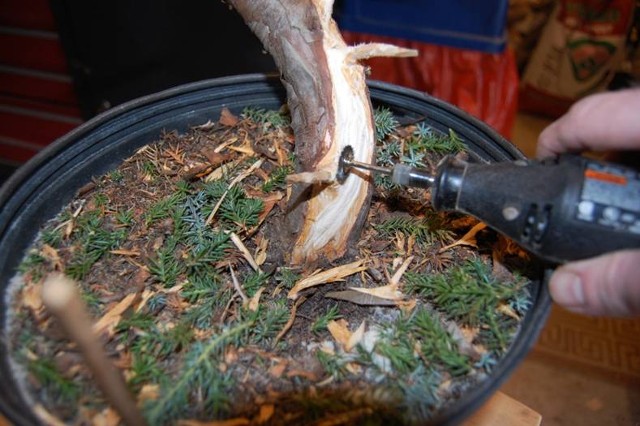
After removing the bark form the old apex, I moved back to the base of
the trunk and began creating a spiral shari incorporating the stubs of the
branches that were removed before. It
is important to note here that when styling junipers, up to 70% of the live
vein can be removed without harming the tree.
The tree will recover by rerouting the vascular flow of the cambium in
order for the tree to survive. They are
amazingly resilient trees, perfect for bonsai.
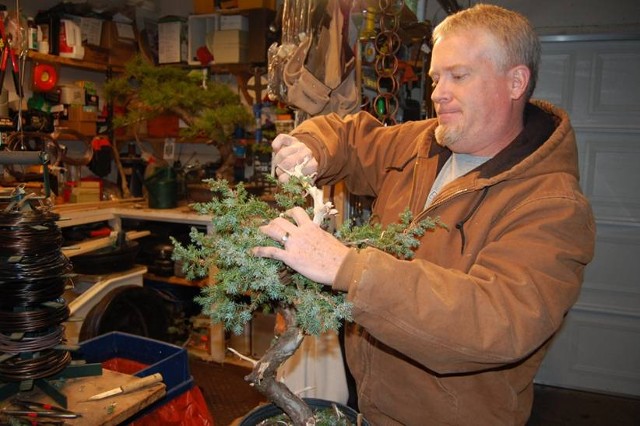
After finishing the rough creation of the jin and shari it was time to
start the actual styling of the tree.
Rob stayed for the wiring of the first 2 branches so that I could show
him exactly what I had planned for the remainder of the branches. I also made sure that he knew what I was
going to do with the new apex. I
stressed to him the importance of anchoring the wire when applying the
wire. This can be done by using one wire
to style 2 different branches. The size
of the wire must be decided by judging the rigidity of the branches being
styled as well as how far you plan on moving them. You can test this by using one of the
branches removed. The Blue Alps Juniper
is surprisingly flexible and the branches were able to be moved into their
desired positions with ease. For larger
more rigid branches 3M Vetrap or raffia should be applied. I did not have to use it on any part of this
tree. After applying the main wire to
bend the branch into the desired position I used smaller gauge wire,
approximately ½ the diameter of the branch you are wiring, to style the
remainder of the growth, even the smallest growth was wired in this case. This is called detail wiring. I Love to wire a tree! It is like meditation to me. I lose all sense of time and all of my stress
is completely relieved.
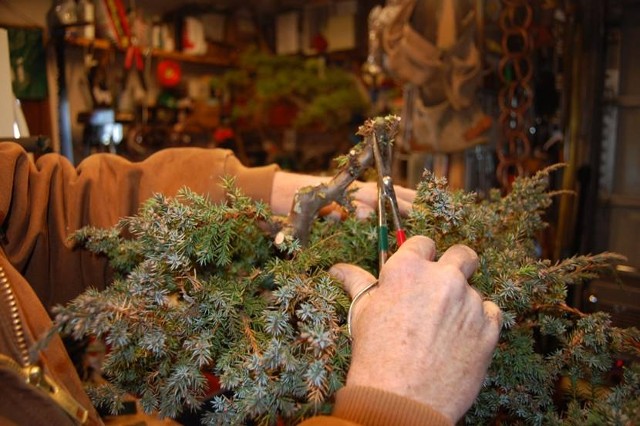
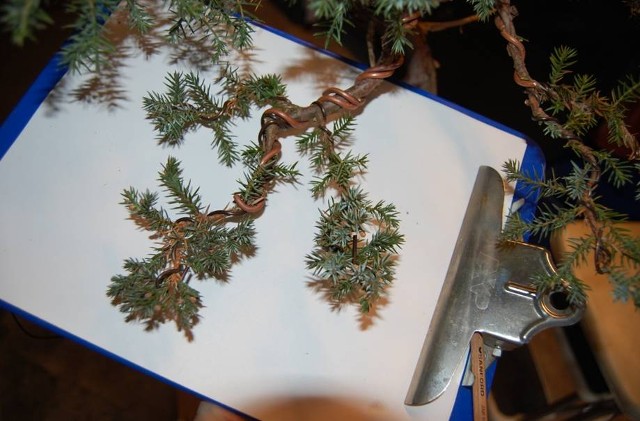
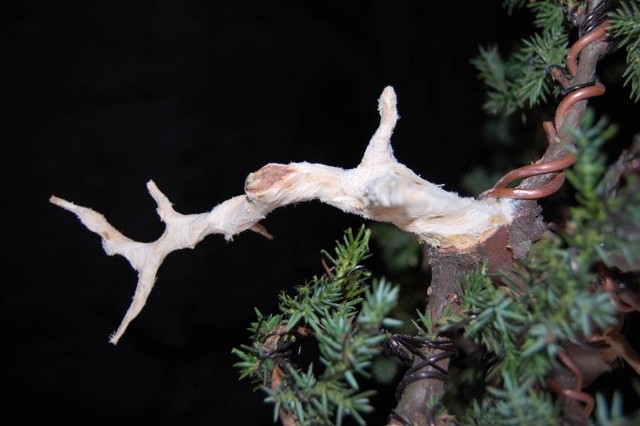
It is important to remember that when preparing to style a branch
several factors come into play.
Eliminate all forks, 3 or more branches growing from one point. Find alternating branches to wire. You can shorten a branch in 2 ways; cut it or
put some movement in it. All movement
should be in the same direction of flow; notice this in the branch pictured
below. To start the pad development in
the correct manner, to give the illusion of a heavy old branch, carefully train
the branch down and create the pad. Make
the pad of foliage as flat as possible taking care not to cross any branches on
the same pad. Loop the wire at the end
under the end of the branch and then bend back to the pain wire in order to
secure the end of the branch so that it doesn’t slip off of the wire. Then train the end of the growth up
slightly. Remove all of the growth under
the pads and trim any growth that is too high for the pad. Use your own judgment when making this
decision. This will allow the entire pad
to receive maximum light and will trigger lots of buds on top of the branches
to fill out the pads. Also remove any growth from the inside of the
curves. Below is a photo of the detail
of one the wired branches.
I worked my way up the tree wiring the branches from bottom to
top. Some of the branches were in just
the right place while others may be redundant.
When deciding what branches need to be removed look at your choices and
ensure that they have enough strong growth on that branch to become part of the
overall design, then remove the unwanted ones.
When removing the branch you need to make a decision to leave a longer
stub for jin or if it is not needed you can totally remove it.
Another point I wanted to state here is something I learned from Bjorn
Bjorholm a couple of years ago. Some
branches may not grow from the tree in exactly the right place. In that case please remember that it doesn’t
matter where the branch originates from the tree, it’s where it ends up. In other words, if 2 branches originate from
the same point on the trunk and you need a back and a left branch, where they
end up is the most important part of the overall design of the tree.
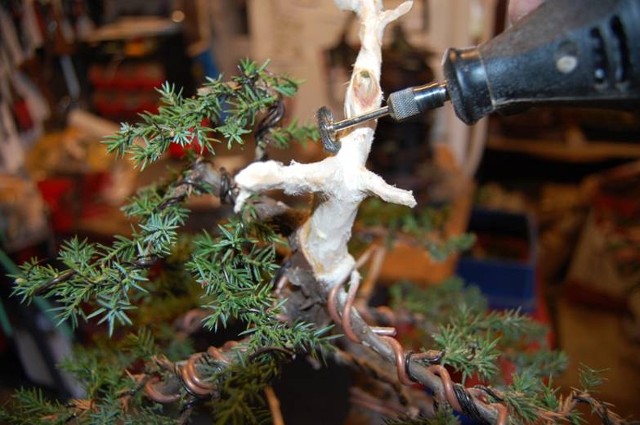
After wiring and styling the
entire tree, I make sure all of the branches are arranged correctly and the
overall silhouette of the tree is a scalene triangle. Then I started work on carving the jin on the
apex and cleaning up the rest of the jin and shari using a wire brush and
various bits on my dremel and larger rotary tool. I carefully carved some spiraling in the deadwood,
commonly seen of old junipers in the wild.
When it is dry, in a couple of months, I will treat it with lime sulfur.
After the carving was complete I
took a look at the entire tree and made any adjustments necessary to complete
the design of the tree. I adjusted the
front, turning it to the right slightly, and soaked the tree. Important since I let the soil dry out prior
to styling so that the branches were more pliable. After that I photographed the results. I’m pretty happy with the way it turned
out. I will be repotting it during the
summer dormancy period or late next winter.
Hope you like it!
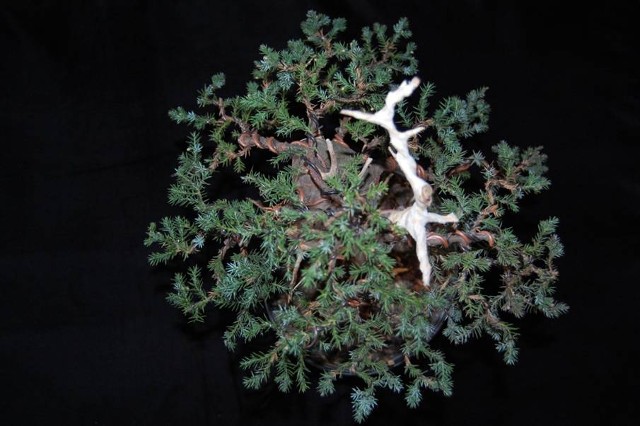
Here are photo details of the top jin and of the tree from
overhead. Note that there are branches
radiating from the trunk in all directions.
Perfect!

Future
Development Plan